Xgody GPS devices offer reliable and accurate navigation features specifically tailored for truck. In this guide, we will walk you through the process of installing an Xgody GPS in your truck, ensuring that you can enjoy the benefits of seamless navigation.
Choosing the Right Xgody GPS for Your Truck
Before diving into the installation process, it’s important to select the appropriate Xgody GPS model for your truck. Consider factors such as screen size, features, and compatibility with your truck’s make and model. Xgody offers a range of GPS devices designed specifically for trucks, taking into account the unique requirements of commercial vehicles.
Gathering the Necessary Tools and Materials
To install the Xgody GPS in your truck, you’ll need a few tools and materials. Here’s a list of the essentials:
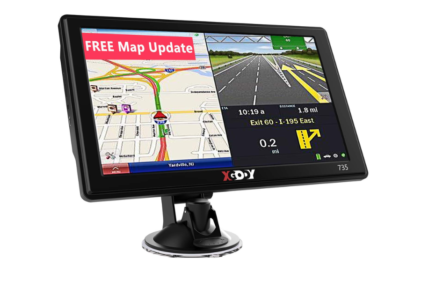
Xgody GPS device
Mounting bracket or dash mount
Power cable
Screwdriver
Wire strippers
Electrical tape
Adhesive tape or Velcro strips
Cleaning supplies (microfiber cloth, glass cleaner)
Make sure you have all these items ready before proceeding with the installation process.
Preparing for the Installation
Before mounting the Xgody GPS device, it’s crucial to prepare your truck’s interior. Start by cleaning the dashboard area where you intend to mount the GPS unit. Remove any dust, debris, or residue that may hinder the adhesive’s effectiveness. A clean surface will ensure a secure and stable installation.
Mounting the Xgody GPS Device
Now it’s time to mount the Xgody GPS device in your truck. Follow these steps:
1. Identify the ideal location on your truck’s dashboard for the GPS unit. Consider factors such as visibility, reachability, and avoiding obstructing your view of the road.
2. If your Xgody GPS device comes with a mounting bracket, attach it to the back of the device. Alternatively, if it includes a dash mount, apply it directly to the dashboard.
3. Align the Xgody GPS device with the chosen location on the dashboard. Press firmly to secure it in place.
4. Use adhesive tape or Velcro strips for additional stability, if necessary.
Connecting the Power Supply
To power your Xgody GPS unit, you’ll need to connect it to a reliable power source in your truck. Here’s how:
1. Locate a suitable power outlet in your truck’s cabin. Often, there is a cigarette lighter or accessory socket available.
2. Plug the Xgody GPS power cable into the power outlet.
3. Connect the other end of the power cable to the GPS unit.
4. Ensure a secure connection by checking that the power cable is firmly inserted.
Setting Up the Xgody GPS System
After mounting and connecting the Xgody GPS device, you need to set up the system according to your preferences. Here’s a general outline of the setup process:
1. Power on the Xgody GPS unit by pressing the designated power button or following the manufacturer’s instructions.
2. Follow the on-screen prompts to select your preferred language, time zone, and other basic settings.
3. Enter your truck’s dimensions, weight, and any other relevant information. This ensures that the Xgody GPS system provides accurate routing and avoids roads with restrictions unsuitable for your truck.
4. Configure the audio and visual settings according to your preferences. Adjust the volume, screen brightness, and other display options to ensure optimal visibility and ease of use.
5. Connect the Xgody GPS device to a stable internet connection if you want to take advantage of live traffic updates, online maps, and other connected features.
6. Set up your favorite locations or waypoints for quick and convenient navigation. This could include your home, regular stops, or frequently visited destinations.
7. Familiarize yourself with the Xgody GPS interface and explore its various functions and features. Take the time to learn how to input addresses, search for points of interest, and customize the display to suit your needs.
Read More :
Testing and Calibrating the GPS
Once you’ve completed the initial setup, it’s essential to test and calibrate the Xgody GPS system to ensure accurate navigation. Follow these steps:
1. Start by entering a destination into the GPS unit. It can be a nearby location or a familiar route you frequently drive.
2. Pay attention to the displayed route and make sure it aligns with your knowledge of the area. The Xgody GPS should choose the most suitable roads for trucks, avoiding narrow streets or low bridges.
3. Follow the navigation instructions and assess the accuracy of the voice guidance and on-screen prompts. Ensure that the Xgody GPS provides clear and timely directions.
4. If you notice any discrepancies or inaccuracies, you may need to recalibrate the GPS system. Consult the user manual or manufacturer’s guidelines for specific instructions on recalibration.
5. During your test drive, monitor the GPS device for any performance issues or signal disruptions. If you encounter problems, consider adjusting the placement of the device or seeking assistance from Xgody customer support.
No responses yet